


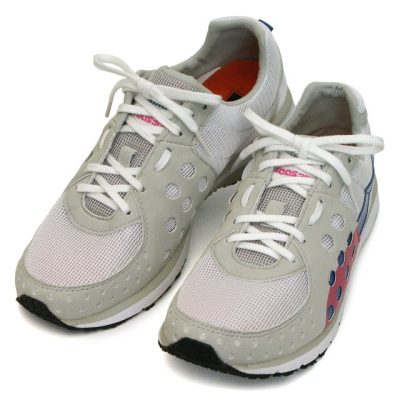
Lacing your walking shoes isn’t just about securing your feet; it’s an opportunity to enhance comfort and style. With various lacing techniques available, you can customize your shoes to suit your foot type and prevent common foot problems like heel slippage or toe pain. In this article, we’ll explore eight different ways to lace your walking shoes, offering step-by-step guidance for each technique.
1. Standard Crisscross Lacing

Crisscross lacing is a classic and effective way to lace your walking shoes. It offers a secure fit that prevents heel slippage, making it ideal for both walking and hiking.
Steps to Crisscross Lacing:
-
Insert one end of the lace into the bottom eyelet from the outside.
-
Thread the other lace end into the opposite bottom eyelet.
-
Cross the laces over and thread through the next eyelet, continuing up the shoe.
-
Tie the lace ends in a bow for a snug fit.
This lacing technique works well for various foot shapes and helps distribute pressure evenly across the shoe, reducing the risk of painful blisters. Whether you’re lacing hiking boots or walking shoes, crisscross lacing ensures your footwear stays secure.
2. Straight European Lacing
For a clean, minimalist look, try Straight European Lacing. This lacing pattern evenly distributes pressure across your foot, making it a comfortable choice for long walks.
Steps to Straight European Lacing:
-
Begin lacing by threading both lace ends through the bottom eyelets.
-
Lace straight up on the inside, skipping one eyelet at a time.
-
Continue this pattern until you reach the top eyelet.
-
Tie the laces together for a secure fit.
This technique reduces pressure points and is especially beneficial for those with high arches or narrow feet. The straight lacing method also adds a touch of sophistication to your shoes.
3. Over Under Lacing
Over Under lacing is both functional and stylish. It helps secure the foot in place, reducing movement inside the shoe and preventing heel slippage.
Steps to Over Under Lacing:
-
Start by inserting the lace into the bottom eyelets from the outside.
-
Cross the laces over and under each other, threading them through the eyelets.
-
Continue this pattern up the entire shoe.
-
Tie the lace ends together.
This lacing style is ideal for those with narrow heels or who need extra stability during activities like hiking. It also adds a unique pattern to your footwear.
Enhance Your Walking Shoe Experience with Loop King’s Coil Shoelaces


Loop King Laces redefine shoelaces with their premium quality and design. These laces offer exceptional durability and style, making them the perfect choice for upgrading your walking shoes.
Crafted from high-quality materials, Loop King Laces are designed to withstand daily wear and tear, ensuring long-lasting performance. Their soft yet sturdy construction provides a comfortable fit, eliminating discomfort and irritation during walks or activities.
Upgrade your walking shoes with Loop King Laces and experience the perfect blend of style and comfort.
4. Gap Lacing
Gap lacing is perfect for those who need to relieve pressure on specific areas of the foot. By skipping eyelets, you can create gaps that allow for a more customized fit.
Steps to Gap Lacing:
-
Insert both lace ends through the bottom eyelets.
-
Cross the laces, then skip an eyelet, threading them through the next one.
-
Repeat until you reach the top eyelets.
-
Tie the laces securely.
Gap lacing is beneficial for individuals with a wide forefoot or high midfoot, offering more room where needed. It’s an excellent option for anyone dealing with foot problems like pressure points or black toenails.
5. Spider Web Lacing
Spider Web lacing is both creative and supportive. This lacing pattern locks the foot in place, providing additional stability for those with ankle issues.
Steps to Spider Web Lacing:
-
Start by inserting the lace into the bottom eyelet.
-
Cross the laces, threading them under the sides of the shoe.
-
Continue crisscrossing until you reach the top eyelet.
-
Tie the lace ends securely.
This technique is ideal for hiking boots, as it ensures your foot stays in place, preventing movement that can lead to painful blisters. It’s also a stylish way to lace your shoes.
6. Sawtooth Lacing
Sawtooth Lacing offers a zigzag pattern that’s not only stylish but also provides extra support. This lacing method is perfect for those needing stability during walks or hikes.
Steps to Sawtooth Lacing:
-
Insert the laces through the bottom eyelets.
-
Cross the laces at an angle, threading through the next eyelet.
-
Continue this pattern up the shoe.
-
Tie the lace ends together.
Sawtooth lacing is especially beneficial for those with high arches or narrow feet, as it helps to lock the foot in place, preventing slippage.
Experience Unmatched Quality and Style with Loop King’s Two Tone Shoelaces


Loop King Laces offer the perfect blend of durability, comfort, and style for your walking shoes. Crafted from premium materials, these laces are designed to withstand daily wear and provide long-lasting performance.
The soft yet sturdy construction of Loop King Laces ensures a comfortable fit, reducing discomfort and irritation during long walks or activities. Available in a variety of colors and lengths, you can easily customize your shoes to reflect your personal style.
In addition to their comfort and style, Loop King Laces are also easy to use, allowing for quick and hassle-free lacing. Upgrade your walking shoes with Loop King Laces and experience the difference that premium shoelaces can make.
7. Heel Lock Lacing
Also known as the “runner’s loop” or “lace lock,” heel lock lacing is essential for preventing heel slippage, especially during intense activities like hiking or trail running.
Steps to Heel Lock Lacing:
-
Lace your shoes using the crisscross method up to the second-to-last eyelet.
-
Lace straight up on the inside, creating a loop.
-
Thread the lace through the loop on the opposite side.
-
Pull tight and tie the laces securely.
This lacing method helps secure the heel and prevents foot movement, reducing the risk of blisters and other foot problems. It’s perfect for those with narrow heels or those who need extra support.
8. Loop Back Lacing
Loop Back lacing adds a unique twist to your shoes by looping the laces back through the same eyelet, creating a stylish and functional pattern.
Steps to Loop Back Lacing:
-
Begin by lacing your shoes using the standard method.
-
At the top eyelet, loop the laces back through the same eyelet on the opposite side.
-
Tie the laces securely.
This method adds both style and security to your shoes, making them stand out while ensuring a snug fit.
Upgrade Your Lacing Game with Loop King Laces
Loop King Laces offers premium-quality laces perfect for any lacing style. With their durable and stylish designs, you can re-lace your shoes to achieve the perfect fit and look.
Whether you prefer flat laces or need extra-long laces for hiking boots, Loop King Laces has you covered. Choose from various colors and lengths to match your shoes and elevate your footwear game.

Miles Anthony Smith
Miles is a loving father of 3 adults, devoted husband of 24+ years, co-chief sneakerhead (along with his wife Carolyn) at Loop King Laces, author, entrepreneur, investor, & owner of several businesses (AmaLinks Pro, Why Stuff Sucks, & Kompelling Kars). Miles has been featured in New York Magazine, Escapist Magazine, FashionSpot, Menswear Style, & Men Style Fashion. Loop King is trusted by sneakerheads JumperMan Kris, jumpmanbostic, ajinchicago, among others.


OFF-WHITE “SHOELACES”
Gold Tip Shoelaces
BROWSE LEATHER LACES
Gold Tip Shoelaces
BROWSE ROPE LACES
Gold Tip Shoelaces
BROWSE FLAT WAXED LACES
Gold Tip Shoelaces